Tutorial: Retexture a Default Hair
Jan. 20th, 2019 01:32 pmI got this question over at my tumblr:
Things you'll need:
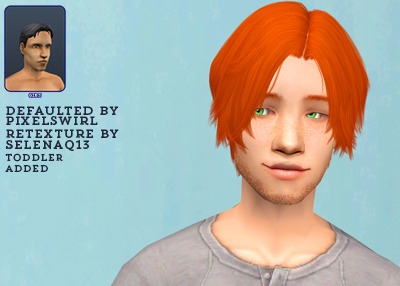
For this tutorial, I'm going to retexture this replacement of MhairGibs by PixelSwirl.
This is what it looks like:
Moving on!

► Before you can start retexturing, you need to save the PNG file as a DDS file. This makes sure the Alpha Channels get transferred to your new texture.
Go to File>Save as> and pick .D3D/DDS from the dropdown menu.

► Be sure to select DXT5, interpolated alpha:

Close the PNG file, you won't need it anymore.
► Open you new DDS file. Be mindful of the Load Options. I have Photoshop CC2015, and I have to pick Load Transparency As Alpha Channel. Back with my older PS, I had to choose Load Default Sizes. You'll get a pop-up with one of these 2 choices. Choose the one that applies to your version ^_^

Here's what it will look like*

* actual appearance will vary depending on the method used by the person who make the original texture ;)
▷ I'm not going to go too far in the actual retexture part, I am going to assume you know how to make one. I'll mention 1 point though:
Depending on the texture you're using, the placement of highlights and shadows will be more or less important. Most Maxis Match textures have little shading and highlights so the placing isn't that important. It will look better when payed attention to, but it won't be that bad if you don't. Unlike shiny textures like Pooklet, Io, or Lilith's edits of Remi's textures, which will look bad when you don't pay attention to placement.
I'll be using Remi's textures. They have a little shine, so I like to be aware of the placement. As you can see in the above picture, it's just a large square of texture. I like to see where the strands are. And fortunately, I can ^_^
▷ In your layer panel, got to Channels.

▷ You'll see the color channels with an eye in front (meaning they're visible) and an alpha channel. Click on the check box of that channel and:

▷ The alpha is overlayed on the texture. Now I know where the strands are, I can start applying my texture. I'll be using Remi's texture and Pooklet's colors but you can use whatever :)
▷ Remember, you'll want .DDS files to work with. So when you're done with a color, save the file as .DDS using the same settings you used earlier. Do this for all colors.

► Once you've finished and saved all colors you need, close Photoshop and go back to SimPE.
Time to do the actual replacing.
► Like before, open the Default file in SimPE and click on Texture Image in the Resource Tree. Click on one of the texture files.

► As you can see, I found the black texture. Right-click on the texture image and choose Import DDS...

► Navigate to your newly created black retexture and select it. Don't forget to click Commit to commit your changes

► Do this for all colors. Double check to make sure you haven't missed one. Don't forget to commit after every texture.
> Sometimes Defaults will have transparent textures. Leave those alone.
► Save the file when you're done replacing all the textures.
► And that's it. ^_^ Keep in mind that this method of texture replacing bloats your file size like whoa, so Compressorizer is a must.

I hope this was helpful, I tend to ramble a bit. Please let me know if you have any questions, I'll do my best to answer them.
I also recommend Poppet's tutorial on DDS retexturing if you'd like to know more about retexturing using DDS files.
Happy Simming!
hi! sorry to bother you, but do you know is there any existing tutorial on how to recolor/retexture already existing defaulted hairs? :DAnd I don't think there is... There are multiple tutorials you can use to help, but I can't think of 1 that specifically deals with applying new textures to an already defaulted hair. So I made you one ^_^
Things you'll need:
For this tutorial, I'm going to retexture this replacement of MhairGibs by PixelSwirl.
This is what it looks like:
► Open the Default file in SimPE and click on Texture Image in the Resource Tree
► On the right side, you'll see a bunch of texture files. Click on one to view it. I like to work of the blond texture, but it doesn't really matter :)

Found it!
► Extract the texture.
Right-click on the texture image and click Export. Save the file somewhere you'll remember. 
Moving on!
► Before you can start retexturing, you need to save the PNG file as a DDS file. This makes sure the Alpha Channels get transferred to your new texture.
Go to File>Save as> and pick .D3D/DDS from the dropdown menu.
► Be sure to select DXT5, interpolated alpha:
Close the PNG file, you won't need it anymore.
► Open you new DDS file. Be mindful of the Load Options. I have Photoshop CC2015, and I have to pick Load Transparency As Alpha Channel. Back with my older PS, I had to choose Load Default Sizes. You'll get a pop-up with one of these 2 choices. Choose the one that applies to your version ^_^
Here's what it will look like*
* actual appearance will vary depending on the method used by the person who make the original texture ;)
▷ I'm not going to go too far in the actual retexture part, I am going to assume you know how to make one. I'll mention 1 point though:
Depending on the texture you're using, the placement of highlights and shadows will be more or less important. Most Maxis Match textures have little shading and highlights so the placing isn't that important. It will look better when payed attention to, but it won't be that bad if you don't. Unlike shiny textures like Pooklet, Io, or Lilith's edits of Remi's textures, which will look bad when you don't pay attention to placement.
I'll be using Remi's textures. They have a little shine, so I like to be aware of the placement. As you can see in the above picture, it's just a large square of texture. I like to see where the strands are. And fortunately, I can ^_^
▷ In your layer panel, got to Channels.
▷ You'll see the color channels with an eye in front (meaning they're visible) and an alpha channel. Click on the check box of that channel and:
▷ The alpha is overlayed on the texture. Now I know where the strands are, I can start applying my texture. I'll be using Remi's texture and Pooklet's colors but you can use whatever :)
▷ Remember, you'll want .DDS files to work with. So when you're done with a color, save the file as .DDS using the same settings you used earlier. Do this for all colors.
► Once you've finished and saved all colors you need, close Photoshop and go back to SimPE.
Time to do the actual replacing.
► Like before, open the Default file in SimPE and click on Texture Image in the Resource Tree. Click on one of the texture files.
► As you can see, I found the black texture. Right-click on the texture image and choose Import DDS...
► Navigate to your newly created black retexture and select it. Don't forget to click Commit to commit your changes
► Do this for all colors. Double check to make sure you haven't missed one. Don't forget to commit after every texture.
> Sometimes Defaults will have transparent textures. Leave those alone.
► Save the file when you're done replacing all the textures.
► And that's it. ^_^ Keep in mind that this method of texture replacing bloats your file size like whoa, so Compressorizer is a must.
I hope this was helpful, I tend to ramble a bit. Please let me know if you have any questions, I'll do my best to answer them.
I also recommend Poppet's tutorial on DDS retexturing if you'd like to know more about retexturing using DDS files.
Happy Simming!